From the GNURADIO website: "GNU Radio has a steep learning curve", Fuck off, what it really means is:
GNU Radio is porly written / implemented / not user fiendly / has too many obscure install options and is designed to simply waste your time.
Furthermore the build-gnuradio script is fucking stupid. It will ruin your system, beware. Best to stick to the deb packages if you are on Debian.
WindyCityTech Blogger
WindyWindyCityTech Wordpress
Showing posts with label Linux. Show all posts
Showing posts with label Linux. Show all posts
Saturday, 19 October 2013
Saturday, 5 October 2013
Hostapd creation bash script for Linux pi
This script can do several things:
Apart from requiring hostapd and echo, a suitable dhcp server should be installed on the system for the interface.
Also it is mandatory that the WLAN adaptor can support AP mode, otherwise the script will not work.
WindyCityTech Blogger
WindyWindyCityTech Wordpress
- Setup and start a hostapd based AP from the command line
- Save and recall previous hostapd AP configs created by the script
- Use default variables for the configuration if some are omitted
- Copy the config file to /etc/hostapd/hostapd.conf so the hostapd service can use it on startup
Apart from requiring hostapd and echo, a suitable dhcp server should be installed on the system for the interface.
Also it is mandatory that the WLAN adaptor can support AP mode, otherwise the script will not work.
WindyCityTech Blogger
WindyWindyCityTech Wordpress
Friday, 14 June 2013
UPDATE: Modern Bash Wifi Connection Script for Linux; goodbye network manager
An update to a previous post. This script has some more command line features, such as calling up previous saved sessions credentials from the command line and improved error handling. Completely run from the command line.
View it here: http://pastebin.com/J229Gc1t
or below.
WindyCityTech Blogger
WindyWindyCityTech Wordpress
View it here: http://pastebin.com/J229Gc1t
or below.
#!/bin/bash


# http://pastebin.com/J229Gc1t

# 12/06/2013

# This script attempts to semi-automate the wifi connection process from

# the command line.

# It is intended to be used on a headless machine without the

# requirement of typing several commands for a connection.

# The script stores previous connection credentials in PLAINTEXT as

# *.wpa files in the executed directory and in /etc/wpasupplicant.conf.

# These .wpa files are used to connect to several different ap using

# previously stored info.

# Probably a good idea to stop and other network managing software while

# running this script, also in testing wpa_supplicant does a pretty good

# job of re-connecting a disassociated link automatically.

#

# Mainly created from a combination of scripts taken from theses two

# sources:

# http://www.backtrack-linux.org/forums/archive/index.php/t-3367.html

# AND

# http://www.linuxquestions.org/questions/linux-general-1/wifi-connect\

# -script-tested-in-ubuntu-772646/

#

# old version1  http://pastebin.com/Pa90HBiU  01/06/2013

#  very simple first version

# old version2  http://pastebin.com/FzJnv5Nk  02/06/2013

# minor additions

# old version3  http://pastebin.com/3mu1XT5Y  08/06/2013

# included ability to call up previous saved files from

# command line.  Some checking of command line parameters and

# checking for empty saved files

# current version

# Added exit retrurn values

#

# Copy, Distribute and Modify Freely.

#


if [ -z "$1" ]; then

 printf "Usage: $0 -i [interface] OR AND -f [SAVED_FILE.wpa]\n"

 exit 1

fi


while getopts  "i:f:" opt

 do

  case $opt in

  i ) INT=${OPTARG};;

  f ) ITEM=${OPTARG};;

  \?) printf "Usage: $0 -i [interface] OR AND -f [SAVED_FILE.wpa]\n"

   exit 1;;

  * ) printf "Usage: $0 -i [interface] OR AND -f [SAVED_FILE.wpa]\n"

   exit 1;;

  esac

 done


#

# check if root

#

if [ "$(id -u)" != "0" ]; then

 printf "This script must be run as root\n" 1>&2

 exit 1

fi


#

# check if interface is entered as command line argument

#

if [ -z "$INT" ]; then

printf "Usage: $0 -i [interface] OR AND -f [SAVED_FILE.wpa]\n"

exit 1

fi


#

# Search for previous saved config files

#

function read_saved (){

 #

 # Search or uses for previous wpa configuration files

 # Checks if command line argument -f [SAVED_FILE.wpa] is greater than zero length and exists

 # before writing the configiuration to wpa_supplicant.conf.  Otherwise create a new

 # configuration.

 #

 if [ -n "$ITEM" ]; then

  if [ -s "$ITEM" ]; then

   printf "File $ITEM exists, proceeding to connect\n"

   write_conf $ITEM

  else  printf "File $ITEM is invalid or does not exist, proceeding to create a new configuration\n"

   conf_create

  fi

 fi

 #

 # Save and change IFS so spaces in file names are not interpreted as

 # separate lines in the array

 #

 OLDIFS=$IFS

 IFS=$'\n'


 #

 # Read all file names into an array

 # ref:http://www.cyberciti.biz/tips/handling-filenames-with-spaces\

 # -in-bash.html

 #

 # " -printf '%f\n' " removes path info from outputs

 #

 # ref:http://serverfault.com/questions/354403/remove-path-from-find\

 # -command-output

 #

 SAVED_LIST=($(find . -type f -name "*.wpa" -printf '%f\n'))


 #

 # restore ifs

 #

 IFS=$OLDIFS


 #

 # Tests for number of saved wifi connections, if none exit

 #

 if [ -z "${SAVED_LIST[0]}" ]; then

  printf "There are no previous saved wifi connections\n"

  #

  # Create new connection

  #

  conf_create

 fi


 #

 #PS3 Sets the prompt for the select statement below

 #

 PS3="Choose a previously saved wifi connection or 's' to skip: "


#

#Select one of the previous saved configurations to connect with or quit

#

select ITEM in "${SAVED_LIST[@]}"; do

 #

 # Quit if selected number does not exist or alpha in entered

 #

 if [ -z "$ITEM" ] ; then

   printf "Skipping\n\n"

   conf_create

 fi

 #

 # Quick check if file is greater than zero length and exists

 #

 if [ -s "$ITEM" ]; then

                        printf "File $ITEM exists, proceeding to connect\n"

                        write_conf "$ITEM"

                else    printf "File $ITEM is invalid or does not exist, proceeding to create a new configuration\n"

   conf_create

 fi

 done

}


function conf_create (){

 #

 # Scans for wifi connections & isolates wifi AP name

 #

 eval LIST=( $(iwlist $INT scan 2>/dev/null | awk -F":" '/ESSID/{print $2}') )


 #

 #PS3 Sets the prompt for the select statement below

 #

 PS3="Choose wifi connection or 'q' to quit: "


 #

 # Tests for number of wifi connections, exits if none

 #

  if [ -z "${LIST[0]}" ]; then

   printf "No available wifi connection using $INT\n"

   exit 1

  fi


 #

 # Select from a LIST of scanned connections

 #

 select ITEM in "${LIST[@]}"; do


  #

  # Quit if selected number does not exist or alpha in entered

  #

  if [ -z "$ITEM" ] ; then

    printf "Exiting\n"

    exit 0

  fi


  #

  # Get user input for passphrase no need to escape spaces

  #

  printf "Enter the passphrase for $ITEM?\n"

  read "PASSPHRASE"


  #

  # Append the ITEM variable (ESSID) to .wpa to make a filename

  # for saved configs

  #

  FILENAME=$ITEM".wpa"


  #

  # Run wpa_passphrase to generate a file for wpa_supplicant to

  # use, store it locally and in etc/wpa_supplicant.conf

  #

  printf "Running wpa_passphrase\n"

  wpa_passphrase "$ITEM" "$PASSPHRASE" > "$FILENAME" | xargs

  #

  # Jump to write_conf function, append configuration filename

  # to ITEM varibale

  #

  ITEM="$FILENAME"

  write_conf

 done

}


function write_conf (){

 #

 # Copy local wpa_supplicant file to etc/wpa_supplicant.conf

 #

 printf "Writing new configuration file using $ITEM\n"

 cat "$ITEM">/etc/wpa_supplicant.conf | xargs

 #

 # Jump to connect function, pass on the ESSID variable for connection

 #

 connect "$ITEM"

}


function connect (){

 printf "Connecting using file $*\n"


 #

 # Capture incoming argument

 #

 ESSID=$*


 #

 # Kill previous instances of wpa_supplicant to stop other instances

 # wpa_supplicant fighting several different AP's

 # Kill based on

 # ref: http://thegeekstuff.com/2011/10/grep-or-and-not-operators

 # and

 # http://stackoverflow.com/questions/3510673/find-and-kill-a-\

 # process-in-one-line-using-bash-and-regex

 #

 # Release dhcp ip's and bring down the interface

 #

 kill $(ps aux | grep -E '[w]pa_supplicant.*\'$INT'' |  awk '{print $2}') 2>/dev/null | xargs

 dhclient $INT -r

 ifconfig $INT down


 #

 # Assign new credentials to interface

 #

 iwconfig $INT mode managed essid "$ESSID"

 printf "Configured interface $INT; Credential file is $ESSID\n"

 ifconfig $INT up

 printf "Interface $INT is up\n"

 wpa_supplicant -B -Dwext -i$INT -c/etc/wpa_supplicant.conf 2>/dev/null | xargs

 printf "wpa_supplicant running, sleeping for 15...\n"


 #

 # Wait to connect before asking for a ip address

 #

 sleep 15

 printf "Running dhclient\n"

 dhclient $INT


 #

 # Show current ip for interface

 #

 ifconfig $INT | grep inet

exit 0

}


function clean_slate (){

 #

 # Optional Clean Slate commands, it is recommended that you perform

 # a "airmon-ng check kill" to ensure that any other network managers

 # do not interfere with the connection process

 #


 printf "It is recommended that you perform a \"airmon-ng check kill\" once to ensure that any other network managers do not interfere with the connection process\n\n"


 #

 # Untested, airmon-ng check kill works better here

 #

 # service network-manager stop 2>/dev/null >/dev/null

 # service avahi-daemon stop 2>/dev/null >/dev/null

 # sleep 10

 # killall wpa_supplicant 2>/dev/null

 # ifconfig $INT up

}


#

# Start here

#

clean_slate

read_saved


exit 0
WindyCityTech Blogger
WindyWindyCityTech Wordpress
Tuesday, 4 June 2013
Quick install of Linux firmware htc_9271.fw for TP-LINK TLWN422G USB Wireless
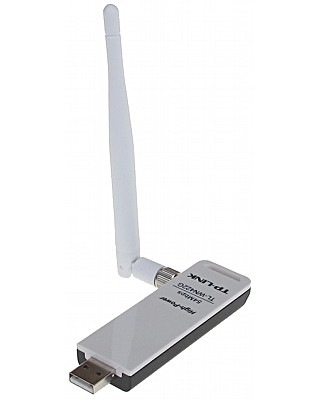
Download firmware from here or search for newer.
http://wireless.kernel.org/download/htc_fw/1.3/htc_9271.fw
sudo cp htc_9271.fw /lib/firmware/.
Plug in device and do a dmesg to see if firmware is loaded.
Works great on airodump-ng, injection is super.\
lsusb
Bus 001 Device 004: ID 0cf3:1006 Atheros Communications, Inc. TP-Link TL-WN322G v3 / TL-WN422G v2 802.11g [Atheros AR9271]
Don't waste time trying to compile anything else.
WindyCityTech Blogger
WindyWindyCityTech Wordpress
Sunday, 2 June 2013
Modern Bash Wifi Connection Script for Linux; goodbye network manager
19/10/2013 Update here
This script attempts to semi-automate the wifi connection process fromthe command line. It is intended to be used on a headless / GUI-less machine without the
requirement of typing several commands for a connection. For instance a Raspberry PI.
It works reasonably well for most applications and can handle ESSID's / passwords with spaces.
Storage of previous connection credentials is in PLAINTEXT as [ESSID].wpa files in the executed directory and in /etc/wpasupplicant.conf.
These .wpa files are used to connect to several different AP's using previously stored info.
Probably a real good idea to stop and other network managing software while running this script, for instance running "airmon-ng check kill" will do a good job.
Also in testing wpa_supplicant does a pretty good job of re-connecting a disassociated link automatically.
Operation is simple. In the case with Debian it is:
sudo ./connect.sh wlan0
Mainly created from a combination of scripts taken from theses two
sources:
http://www.backtrack-linux.org/forums/archive/index.php/t-3367.html
AND
http://www.linuxquestions.org/questions/linux-general-1/wifi-connect-script-tested-in-ubuntu-772646/
Feel free to comment or send improvements.
Download from http://pastebin.com/FzJnv5Nk
or below.
#!/bin/bash


# http://pastebin.com/Pa90HBiU

# 01/06/2013

# This script attempts to semi-automate the wifi connection process from

# the command line.

# It is intended to be used on a headless machine without the

# requirement of typing several commands for a connection.

# The script stores previous connection credentials in PLAINTEXT as

# *.wpa files in the executed directory and in /etc/wpasupplicant.conf.

# These .wpa files are used to connect to several different ap using

# previously stored info.

# Probably a good idea to stop and other network managing software while

# running this script, also in testing wpa_supplicant does a pretty good

# job of re-connecting a disassociated link automatically.

#

# Mainly created from a combination of scripts taken from theses two

# sources:

# http://www.backtrack-linux.org/forums/archive/index.php/t-3367.html

# AND

# http://www.linuxquestions.org/questions/linux-general-1/wifi-connect\

# -script-tested-in-ubuntu-772646/

#

# old version  http://pastebin.com/Pa90HBiU  01/06/2013

#

# Copy, Distribute and Modify Freely.

#


INT=$1


if [ -z "$1" ]; then

 printf "Usage: $0 [interface]\n"

 exit

fi


if [ "$(id -u)" != "0" ]; then

 printf "This script must be run as root\n" 1>&2

 exit

fi


#

# Search for previous saved config files

#

function read_saved {

 #

 # Search for previous wpa configuration files.

 #


 #

 # Save and change IFS so spaces in file names are not interpreted as

 # separate lines in the array

 #

 OLDIFS=$IFS

 IFS=$'\n'


 #

 # Read all file names into an array

 # ref:http://www.cyberciti.biz/tips/handling-filenames-with-spaces\

 # -in-bash.html

 #

 # " -printf '%f\n' " removes path info from outputs

 #

 # ref:http://serverfault.com/questions/354403/remove-path-from-find\

 # -command-output

 #

 SAVED_LIST=($(find . -type f -name "*.wpa" -printf '%f\n'))


 #

 # restore ifs

 #

 IFS=$OLDIFS


 #

 # Tests for number of saved wifi connections, if none exit

 #

 if [ -z "${SAVED_LIST[0]}" ]; then

  printf "There are no previous saved wifi connections\n\n"

  #

  # Create new connection

  #

  conf_create

 fi


 #

 #PS3 Sets the prompt for the select statement below

 #

 PS3="Choose a previously saved wifi connection or 's' to skip: "


#

#Select one of the previous saved configurations to connect with or quit

#

select ITEM in "${SAVED_LIST[@]}"; do

 #

 # Quit if selected number does not exist or alpha in entered

 #

 if [ -z "$ITEM" ] ; then

   printf "Skipping\n"

   conf_create

 fi


 printf "$ITEM is selected\n"

 cat "$ITEM">/etc/wpa_supplicant.conf | xargs

 connect "$ITEM"

done

}


function conf_create (){

 #

 # Scans for wifi connections & isolates wifi AP name

 #

 eval LIST=( $(iwlist $INT scan 2>/dev/null | awk -F":" '/ESSID/{print $2}') )


 #

 #PS3 Sets the prompt for the select statement below

 #

 PS3="Choose wifi connection or 'q' to quit: "


 #

 # Tests for number of wifi connections, exits if none

 #

  if [ -z "${LIST[0]}" ]; then

   printf "No available wifi connection using $INT\n"

   exit

  fi


 #

 # Select from a LIST of scanned connections

 #

 select ITEM in "${LIST[@]}"; do

 ifconfig $INT | grep inet


  #

  # Quit if selected number does not exist or alpha in entered

  #

  if [ -z "$ITEM" ] ; then

    printf "Exiting\n"

    exit

  fi


  #

  # Get user input for passphrase no need to escape spaces

  #

  printf "Enter the passphrase for $ITEM?\n"

  read "PASSPHRASE"


  #

  # Append the ITEM variable (ESSID) to .wpa to make a filename

  # for saved configs

  #

  FILENAME=$ITEM".wpa"


  #

  # Run wpa_passphrase to generate a file for wpa_supplicant to

  # use, store it locally and in etc/wpa_supplicant.conf

  #

  printf "Running wpa_passphrase\n"

  wpa_passphrase "$ITEM" "$PASSPHRASE" > "$FILENAME" | xargs

  cat "$FILENAME">/etc/wpa_supplicant.conf | xargs

  printf "Creating new configuration using $ITEM\n"


  #

  # Jump to connect function, pass on the ESSID variable for connection

  #

  connect $ITEM

 done

}


function connect (){

 printf "Connecting using file $*\n"


 #

 # Capture incoming argument

 #

 ESSID=$*


 #

 # Kill previous instances of wpa_supplicant to stop other instances

 # wpa_supplicant fighting several different AP's

 # Kill based on

 # ref: http://thegeekstuff.com/2011/10/grep-or-and-not-operators

 # and

 # http://stackoverflow.com/questions/3510673/find-and-kill-a-\

 # process-in-one-line-using-bash-and-regex

 #

 # Release dhcp ip's and bring down the interface

 #

 kill $(ps aux | grep -E '[w]pa_supplicant.*\'$INT'' |  awk '{print $2}') 2>/dev/null | xargs

 dhclient $INT -r

 ifconfig $INT down


 #

 # Assign new credentials to interface

 #

 iwconfig $INT mode managed essid "$ESSID"

 printf "Configured interface $INT; ESSID is $ESSID\n"

 ifconfig $INT up

 printf "Interface $INT is up\n"

 wpa_supplicant -B -Dwext -i$INT -c/etc/wpa_supplicant.conf 2>/dev/null | xargs

 printf "wpa_supplicant running, sleeping for 15...\n"


 #

 # Wait to connect before asking for a ip address

 #

 sleep 15

 printf "Running dhclient\n"

 dhclient $INT


 #

 # Show current ip for interface

 #

 ifconfig $INT | grep inet

exit

}


function clean_slate (){

 #

 # Optional Clean Slate commands, it is recommended that you perform

 # a "airmon-ng check kill" to ensure that any other network managers

 # do not intefere with the connection process

 #


 printf "It is recommended that you perform a \"airmon-ng check kill\" once to ensure that any other network managers do not interfere with the connection process\n"


 #

 # Untested, airmon-ng check kill works better here

 #

 # service network-manager stop 2>/dev/null >/dev/null

 # service avahi-daemon stop 2>/dev/null >/dev/null

 # sleep 10

 # killall wpa_supplicant 2>/dev/null

 # ifconfig $INT up

}


#

# Start here

#

clean_slate

read_saved


exit
WindyCityTech Blogger
WindyWindyCityTech Wordpress
Wednesday, 22 May 2013
Create a Instant Microphone Audio Record Script using arecord and amixer
Why: Sometimes you need to record something NOW. Not Click menus and press record realizing that the microphone volume is too low.
Uses amixer, arecord and xterm all which are native applications with most Linux distros. The script can be shortcutted to a button on the panel and give instant feedback that it is working with VU meters. The record file is date-timestamped for easy reference.
The script is below and is commented for a bit more info on its working.

When you are done, just kill the script using Control+C and look in your home directory to find the datestamped wav file. I found the arecord operating sends the microphone boost to 100% upon execution, but so does audacity. This is not an issue for me but you may choose to use a lower 'Capture' level to even things out.
To migrate this script to a button on the panel, chmod +x the script file, then add the following command as a Custom Application Launcher
sh /path/to/script.sh
WindyCityTech Blogger
WindyWindyCityTech Wordpress
Uses amixer, arecord and xterm all which are native applications with most Linux distros. The script can be shortcutted to a button on the panel and give instant feedback that it is working with VU meters. The record file is date-timestamped for easy reference.
The script is below and is commented for a bit more info on its working.
#!/bin/bash

amixer sset -c 0 'Mic' playback off

amixer sset -c 0 'Mic' 90%

amixer sset -c 0 'Mic Boost' 90%

amixer sset 'Capture' cap

amixer sset -c 0 'Capture' 90%

xterm -e arecord ~/record_$(date +%Y%m%d%H%M%S).wav -v -V'stereo' -f cd &

When you are done, just kill the script using Control+C and look in your home directory to find the datestamped wav file. I found the arecord operating sends the microphone boost to 100% upon execution, but so does audacity. This is not an issue for me but you may choose to use a lower 'Capture' level to even things out.
To migrate this script to a button on the panel, chmod +x the script file, then add the following command as a Custom Application Launcher
sh /path/to/script.sh
WindyCityTech Blogger
WindyWindyCityTech Wordpress
Sunday, 31 March 2013
Disable NTP sending out requests on Raspberry PI Linux
As beautiful as NTP is, NTP chatter can pollute your network traffic.
Forget removing NTP services, that is too dramatic for the system. A simple hack is to edit the /etc/ntp.conf file and remove the servers.
sudo nano /etc/ntp.conf
scroll down and hash out the lines like below:
# You do need to talk to an NTP server or two (or three).
#server ntp.your-provider.example
# pool.ntp.org maps to about 1000 low-stratum NTP servers. Your server will
# pick a different set every time it starts up. Please consider joining the
# pool: <http://www.pool.ntp.org/join.html>
#server 0.debian.pool.ntp.org iburst
#server 1.debian.pool.ntp.org iburst
#server 2.debian.pool.ntp.org iburst
#server 3.debian.pool.ntp.org iburst
Control-X and yes to save
Restart NTP:
sudo /etc/init.d/ntp restart
Check syslog
cat /var/log/syslog

WindyCityTech Blogger
WindyWindyCityTech Wordpress
Saturday, 16 March 2013
Notes for configuring udev rules for em28xx USB capture card
Goal:
to create static /dev/video10 for plug in USB capture device em28xx. Static video card location using udev rules ensures that the correct video device is utilised during reboots. Used for motion program www.lavrsen.dk
Soloution:
auto create a symlink from kernel assigned video address to /dev/video10 when em28xx is plugged in.
Plug in device and note video number assignment i.e. video0
then use this command to search for variables that can uniquely identify this device.
udevadm info -a -p $(udevadm info -q path -n /dev/video0)
Create udev rule:
KERNEL=="video[0-9]*", DRIVERS=="em28xx", SYMLINK+="video10"
Where:
KERNEL=="video[0-9]*" binds this rule to only video devices
DRIVERS=="em28xx" bind the rule to devices using driver em28xx
SYMLINK+="video10" creates a symlink from /dev/videoX to /dev/video10
Does it work:
ls /dev/video*
sudo service udev restart
References:
http://www.mythtv.org/wiki/Device_Filenames_and_udev
WindyCityTech Blogger
WindyWindyCityTech Wordpress
Sunday, 17 February 2013
Quick notes, backing up guide linux using CP and DIFF
To Copy
cp -prv "/home/user/Downloads/" "/usbDrive/Downloads/"
To Check Copy Worked
diff -qr "/home/user/Downloads/" "/usbDrive/Downloads/"
References:
http://hints.macworld.com/article.php?story=20100212171620210
http://linuxcommando.blogspot.com.au/2008/05/compare-directories-using-diff-in-linux.html
man cp
man diff
WindyCityTech Blogger
WindyWindyCityTech Wordpress
Notes for setting up openssh server in Linux for Public Key Authentication only
On Client Machine
ssh-keygen -t rsa -b 1024
check to see if permissions for id_rsa is rw-------
On Client Machine copy public key to the server:
scp id_rsa.pub server@192.168.0.1:/home/server
On Server Machine append public key to authorized_keys
cat id_rsa.pub >> ~/.ssh/authorized_keys
On Server Machine
sudo nano /etc/ssh/sshd_config
Edit these...
%h/.ssh/authorized_keys
PubkeyAuthentication yes
PermitRootLogin no
PasswordAuthentication no
UsePAM no
WindyCityTech Blogger
WindyWindyCityTech Wordpress
Sunday, 13 January 2013
How to get file seach working properly in Linux Mate Mint
Whoever decided to cripple the default search (mate-search-tool) should be shot out of a cannon.
The default search searched through a database which was only update once a day via cron. This can be evidenced by performing a seach and noticing that little in the way of HDD access is occuring (it not really searching). Also there is not ovbious way to change the search preferences like in MS windows.
Why perform a search when it does not turn up 100% correct results. The trade over speed and accuracy is idiotic and pathetic, even the MS file search provides better results.
Here's how to fix it.
open mateconf-editor and navigate to /apps/mate-search-tool/
check off; disable_quick_search, show_additional_options

now open mate-search-tool and take a look! Looks nice and actually works, searches attached usb drives and the lot.

references:
man locate
man updatedb
WindyCityTech Blogger
WindyWindyCityTech Wordpress
Sunday, 16 December 2012
How to get rid of the Banner 'media contains digital photos' downloads bluetooth linux mate for ever [solved]
Problem:
When I look in my SD card, caja throws up a stupid blue banner saying "The media contains digital photos"
Cause:
Not entirely sure. Related to gthumb-import.desktop, which has the text "Import with gThumb" which is in /usr/share/applications/gthumb-import.desktop
Nothing in mateconf-editor to tweak as well. Bad coding...
Uninstalling gthumb and any other image program got rid of the banner, but that is not desirable.
Solution:
Open/create the file /home/$USER/.local/share/applications/mimeapps.list and add these lines (reference http://www.freedesktop.org/wiki/Specifications/mime-actions-spec)
[Removed Associations]
x-content/image-dcf=gthumb-import.desktop;
x-content/image-picturecd=gthumb-import.desktop;brasero.desktop;
then update the mime database and killall instances of caja
sudo update-mime-database /usr/share/mime
pkill caja

Do not get happy and try modifying /usr/share/applications/mimeinfo.cache as it will get overwritten without warning.
Reference: http://www.allquests.com/question/1705936/This-media-contains-digital-photos.html
Had a similar problem with the Downloads directory, same stupid blue banner again, "Personal File Sharing", "You can receive files over Bluetooth into this folder".
This time I uninstalled the bluetooth sharing agent:
mate-user-share
and did another pkill caja
in mateconf-editor the key /desktop/mate/file_sharing/bluetooth_obexpush_enabled looks suspicious

To all the retards that want these helpful hints, download Ubuntu please or better yet, purchase Windows / Mac OS.
WindyCityTech Blogger
WindyWindyCityTech Wordpress
When I look in my SD card, caja throws up a stupid blue banner saying "The media contains digital photos"
Cause:
Not entirely sure. Related to gthumb-import.desktop, which has the text "Import with gThumb" which is in /usr/share/applications/gthumb-import.desktop
Nothing in mateconf-editor to tweak as well. Bad coding...
Uninstalling gthumb and any other image program got rid of the banner, but that is not desirable.
Solution:
Open/create the file /home/$USER/.local/share/applications/mimeapps.list and add these lines (reference http://www.freedesktop.org/wiki/Specifications/mime-actions-spec)
[Removed Associations]
x-content/image-dcf=gthumb-import.desktop;
x-content/image-picturecd=gthumb-import.desktop;brasero.desktop;
then update the mime database and killall instances of caja
sudo update-mime-database /usr/share/mime
pkill caja

Reference: http://www.allquests.com/question/1705936/This-media-contains-digital-photos.html
Had a similar problem with the Downloads directory, same stupid blue banner again, "Personal File Sharing", "You can receive files over Bluetooth into this folder".
This time I uninstalled the bluetooth sharing agent:
mate-user-share
and did another pkill caja
in mateconf-editor the key /desktop/mate/file_sharing/bluetooth_obexpush_enabled looks suspicious

To all the retards that want these helpful hints, download Ubuntu please or better yet, purchase Windows / Mac OS.
WindyCityTech Blogger
WindyWindyCityTech Wordpress
Saturday, 15 December 2012
Creating a custom montitor configuration in mate Linux laptop that sitcks!
Scenario:
One laptop and one external monitor.
The laptop screen is the primary monitor (LVDS1)
The external monitor is the secondary monitor, orientated left (HDMI1)
Problem:
When the lid of the laptop is put down and then raised, the screens do not retain resolution settings and does either one of the following:
Laptop LCD off
Laptop LCD resolution wrong
External monitor rotated back to normal instead of orientated left.
Why this is happening:
It seems that there are too many things that can cause the screen resolution to change, including ACPI daemon, mate screensaver, lid.sh.... Too many cooks spoil the broth....
Solutions:
The manual solution is to unplug the HDMI cable and lower and raise the lid and then plug HDMI back in. Not good enough.
Control freak Solution:
First get your screen setup right, use the 'mate-display-properties' to get your resolution and orientation correct.
Then open 'mateconf-editor' and tweak these settings:
apps/mate-power-manager/buttons lid_ac = nothing
This will now prevent your system form changing your monitor settings on your behalf.
In a command line as a normal user excute the xrandr command.
translating from the xrandr output, a single line command to reset the screen to the desired dimension can be found:
xrandr --output LVDS1 --mode 1366x768 --rotate normal --output HDMI1 --mode 1440x900 --rotate left --right-of LVDS1
Now at this stage, depending on your situation, you can 'hardcode' you configuration into your system and make it stick OR crate a xrandr script that is manually activated.
looking in /etc/acpi/events/lidbtn shows that the script /etc/acpi/lid.sh
is called when the lid button is activated
Having a look in the last line of /etc/acpi/lid.sh yeilds this:
This file lid.sh.post, if exists is excututed when the lis switch is activated. Note that this file does not exist by default, so it needs to be made.
sudo mkdir /etc/acpi/local/
sudo touch lid.sh.post
add this to the file lid.sh.post
then make it excutable:
sudo chmod +x lid.sh.post
Test to see if the lid closing and opening changes the screen setup.
References:
http://dosnlinux.wordpress.com/2007/01/19/xubuntu-acpi-the-lid/
WindyCityTech Blogger
WindyWindyCityTech Wordpress
One laptop and one external monitor.
The laptop screen is the primary monitor (LVDS1)
The external monitor is the secondary monitor, orientated left (HDMI1)
Problem:
When the lid of the laptop is put down and then raised, the screens do not retain resolution settings and does either one of the following:
Laptop LCD off
Laptop LCD resolution wrong
External monitor rotated back to normal instead of orientated left.
Why this is happening:
It seems that there are too many things that can cause the screen resolution to change, including ACPI daemon, mate screensaver, lid.sh.... Too many cooks spoil the broth....
Solutions:
The manual solution is to unplug the HDMI cable and lower and raise the lid and then plug HDMI back in. Not good enough.
Control freak Solution:
First get your screen setup right, use the 'mate-display-properties' to get your resolution and orientation correct.
Then open 'mateconf-editor' and tweak these settings:
apps/mate-power-manager/buttons lid_ac = nothing
This will now prevent your system form changing your monitor settings on your behalf.
In a command line as a normal user excute the xrandr command.
Screen 0: minimum 320 x 200, current 2266 x 1440, maximum 8192 x 8192

LVDS1 connected 1366x768+0+327 (normal left inverted right x axis y axis) 344mm x 193mm

   1366x768       60.0*+

   1360x768       59.8     60.0

   1024x768       60.0

   800x600        60.3     56.2

   640x480        59.9

VGA1 disconnected (normal left inverted right x axis y axis)

HDMI1 connected 900x1440+1366+0 left (normal left inverted right x axis y axis) 410mm x 256mm

   1440x900       59.9*+   75.0

   1280x1024      75.0     60.0

   1280x960       60.0

   1152x864       75.0

   1024x768       75.1     70.1     60.0

   832x624        74.6

   800x600        72.2     75.0     60.3     56.2

   640x480        72.8     75.0     66.7     60.0

   720x400        70.1

DP1 disconnected (normal left inverted right x axis y axis
translating from the xrandr output, a single line command to reset the screen to the desired dimension can be found:
xrandr --output LVDS1 --mode 1366x768 --rotate normal --output HDMI1 --mode 1440x900 --rotate left --right-of LVDS1
Now at this stage, depending on your situation, you can 'hardcode' you configuration into your system and make it stick OR crate a xrandr script that is manually activated.
looking in /etc/acpi/events/lidbtn shows that the script /etc/acpi/lid.sh
is called when the lid button is activated
# /etc/acpi/events/lidbtn

# Called when the user closes or opens the lid


event=button[ /]lid

action=/etc/acpi/lid.sh
Having a look in the last line of /etc/acpi/lid.sh yeilds this:
[ -x /etc/acpi/local/lid.sh.post ] && /etc/acpi/local/lid.sh.postThis file lid.sh.post, if exists is excututed when the lis switch is activated. Note that this file does not exist by default, so it needs to be made.
sudo mkdir /etc/acpi/local/
sudo touch lid.sh.post
add this to the file lid.sh.post
#! /bin/sh

xrandr --output LVDS1 --mode 1366x768 --rotate normal --pos 0x327 --output HDMI1 --mode 1440x900 --rotate left --pos 1366x0 --right-of LVDS1
then make it excutable:
sudo chmod +x lid.sh.post
Test to see if the lid closing and opening changes the screen setup.
References:
http://dosnlinux.wordpress.com/2007/01/19/xubuntu-acpi-the-lid/
WindyCityTech Blogger
WindyWindyCityTech Wordpress
Getting PDW working using Virtualbox with linux host, pager decoder, pocsag
If you are using virtualbox for windows on a Linux Host and have the group permissions set correctly, then you can decode from the sound card.
Of course you will need a scanner with a discriminator tap installed. Connected to the input of the soundcard.
Tested on Mint Mate.
First, run alsamixer and unmute your sound card input channel, so you can monitor the sound comming in. In my case, go to Mic and press "M" key to unmute. The sound sound should be heard on the pc speakers.

Then open up Virtualbox (version 4) and select settings to ensure Also host driver is selected.

Then on the windows client, ensure that mic is selected, and pager tones can be recorded on the client, use sound recorder.

WindyCityTech Blogger
WindyWindyCityTech Wordpress
Notes for compiling DSD for Linux Mate, digital sound decoder
DSD is a digital sound decoder. It captures demodulated data tones from a radio scanner and processes them to decode the signal. The sound source from the scanner comes from the scanners discriminator tap. The Discriminator tap is the stage before audio filtering and amplification. The best place to get data tones from a analouge radio receiver. It is never 100% due to the analouge domain being digitised by the soundcard, sampling/noise may corrupt the data.
Gathered from various internet sources, works on Mint 13 (Maya).
DSD does not natively install on Linux Mint Mate without a few mods. This is due to the lack of the oss soundsystem and /dev/dsp. A patch is required for dsd_audio.c and both the makefiles of DSD and mbelib have to be modified.
Download dsd and mbelib, extract to seperate folders.
Download modified Makefiles from http://www.tarapippo.net/linux/dsd-makefiles.tar.gz
Extract and rename / overwrite the Makefiles for both DSD and mbelib.
Navigate to the mbdlib folder and:
make
sudo make install
Download dsd_audio_patch.txt from the fourm http://forums.radioreference.com/digital-voice-decoding-software/220493-fix-ubuntu-10-10-a.html
Navigate to dsd folder and patch dsd_audio.c with the following command:
patch dsd-1.4.1/dsd_audio.c dsd_audio_patch.txt
Then you can run (./configure not needed) and make command to compile the code.
now to test before installing.
Run DSD using the following command:
padsp -- ./dsd -i /dev/dsp -o /dev/dsp
padsp is making the OSS wrapper for dsd.
tip: First, run alsamixer and unmute your sound card input channel, so you can monitor the sound coming in. In my case, go to Mic and press "M" key to unmute. The sound sound should be heard on the pc speakers.
WindyCityTech Blogger
WindyWindyCityTech Wordpress
Getting the maximum power and channels on the RTL8187 WLAN wifi card
Reference: http://ubuntuforums.org/archive/index.php/t-1814516.html
Because of your local areas regulations, the operating systems will limit the power and channels based your location rules.
Some locations in the world have no rules on power and channels.
If you want maximum power and channels do this:
sudo iw reg set BO
sudo iwconfig wlan1 txpower 30
Remember to heatsink the RTL8187 so it does not get fried by the power increase.
To check if the change was successful:
sudo iw reg get
You should see the BO region set.
WindyCityTech Blogger
WindyWindyCityTech Wordpress
enable numlock at session start, linux mint, num lock
If you need the numlock to be on after logging in...
sudo apt-get install numlockx
easy.
If you need numlock on before logging in try using setleds in a rc.d or init.d script. Reference: https://www.redhat.com/archives/redhat-install-list/2004-June/msg00108.html
WindyCityTech Blogger
WindyWindyCityTech Wordpress
sudo apt-get install numlockx
easy.
If you need numlock on before logging in try using setleds in a rc.d or init.d script. Reference: https://www.redhat.com/archives/redhat-install-list/2004-June/msg00108.html
setleds -D +num < /dev/tty1
WindyCityTech Blogger
WindyWindyCityTech Wordpress
Caja Remove personal file sharing you can receive files over bluetooth into this folder Mate Linux
WTF, Downloads folder in mate has this annoying message "personal file sharing you can receive files over bluetooth into this folder", with no way to dismiss it.
Stupid message, not worth the wasted space.
To remove:
Run synaptic and remove 'mate-user-share'
then pkill caja
reference:
https://bugs.launchpad.net/ubuntu/+source/gnome-user-share/+bug/532101
WindyCityTech Blogger
WindyWindyCityTech Wordpress
Stupid message, not worth the wasted space.
To remove:
Run synaptic and remove 'mate-user-share'
then pkill caja
reference:
https://bugs.launchpad.net/ubuntu/+source/gnome-user-share/+bug/532101
WindyCityTech Blogger
WindyWindyCityTech Wordpress
Sunday, 2 September 2012
Arch linux is impossible to install for the beginner, don't wate time on it
"Arch Linux, a lightweight and flexible Linux® distribution that tries to Keep It Simple."
Thats statement is so full of shit!
It is noting but a terror to install, even if you downloaded the iso and 'burnt' it to a usb key, you have fuck all chance of installing on a host system without downloading everything again. As of August, Arch has dropped theit automated install (Arch Installation Framework), forcing users to go back in into the dark ages of fdisk and parted...
And to add insult to injury, if you do not have a internet connection, you cannot install.
https://wiki.archlinux.org/index.php/Installation_Guide
Fuck that, don't waste time with arch.
WindyCityTech Blogger
WindyWindyCityTech Wordpress
Thursday, 30 August 2012
Installing scalpel on Linux Mint Mate
sudo apt-get install libtre5 libtre-dev
download and extract the scalpel source from http://www.digitalforensicssolutions.com/Scalpel/
usual tar -xzf , ./configure make / make install....
Now go throught scalpel.conf and edit out files formates you are likely to encounter. By default they are all commented out.
Also remember that you have to have your scalpel.conf file in the present working directory when executing scalpel or use the command 'scalpel -c /path/to/scalpel.conf/'
WindyCityTech Blogger
WindyWindyCityTech Wordpress
Subscribe to:
Posts (Atom)